Welcome! Today I’m sharing one of those simple homemade snacks that feel nostalgic and comforting at the same time: Peanut Butter Sticks.
This recipe is incredibly easy, uses basic pantry ingredients, and creates a crunchy, slightly sweet snack that people of all ages enjoy.
I have always loved recipes like this because they turn everyday bread and peanut butter into something surprisingly addictive.
These peanut butter sticks are perfect for gatherings, lunchboxes, or even evening snacking with tea or coffee.
Hi my name is Dipendra Kumar, I like cooking food for my family and relative. My relative call mer a pro chef. I uploded videos on social media
The process may look old-fashioned, but honestly, that’s what makes them special. You bake, dip, coat, and let them dry — simple steps that create amazing texture and flavor.
What Are Peanut Butter Sticks?
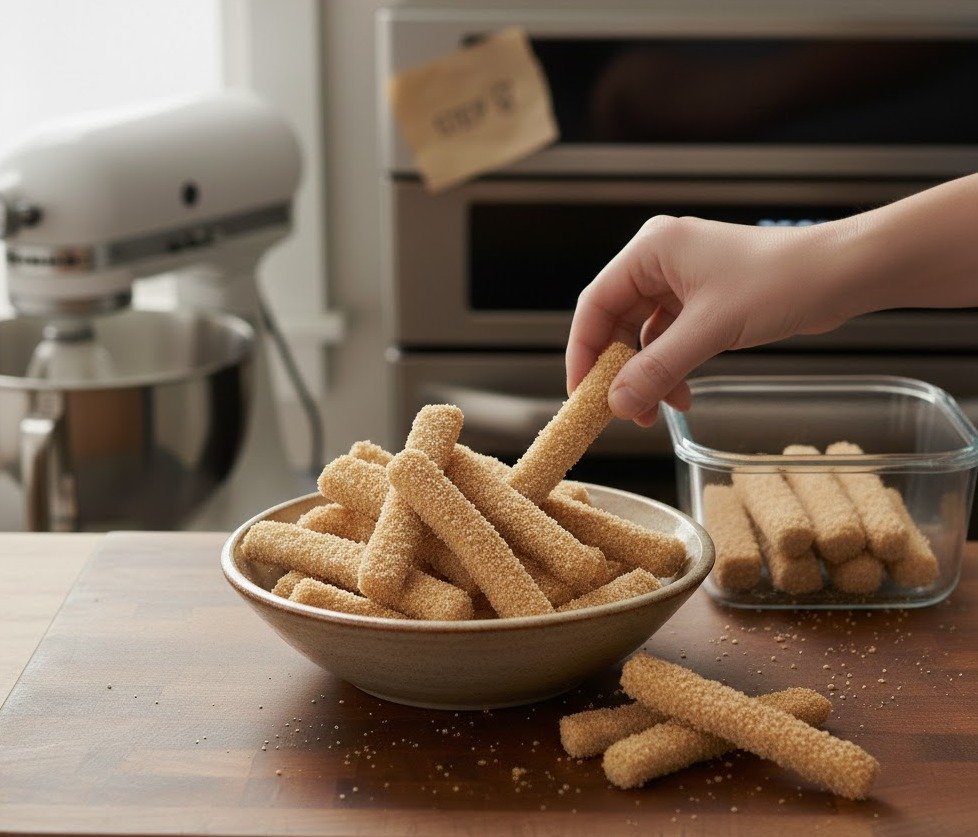
Peanut Butter Sticks are crispy baked breadsticks coated in a warm peanut butter mixture and rolled in crumbs for extra crunch.
They are somewhere between a snack and a dessert, depending on how sweet you make them.
This recipe became popular as a homemade party snack because it travels well, stores nicely, and can even be frozen.
The texture combination is what really makes them unique — crunchy outside, slightly rich coating, and light, crisp bread inside.
Overview
- Recipe Name: Peanut Butter Sticks
- Cuisine: American
- Course: Snack / Appetizer / Sweet Treat
- Skill Level: Easy
- Prep Time: 20 minutes
- Cook Time: 45–60 minutes
- Total Time: About 1 hour 20 minutes
These sticks come from classic American home kitchens where simple ingredients were transformed into crowd-pleasing snacks. The recipe requires very little cooking skill, making it beginner-friendly.
They are baked slowly at a low temperature to dry the bread rather than toast it aggressively.
After that, the sticks are dipped into a warm peanut butter mixture and coated with crumbs, giving them their signature texture.
This recipe produces a large batch, which is one reason families love making it for holidays or unexpected guests.
Ingredients
Below are the ingredients I personally use for balanced flavor and texture.
| Amount | Ingredient | Notes |
|---|---|---|
| 1 large loaf | Whole wheat or sandwich bread | Slightly frozen for easy cutting |
| 13–16 oz | Creamy peanut butter | Smooth works best |
| 1/2 cup | Vegetable oil | Helps coating stay smooth |
| 2 tablespoons | Sugar | Adjust to taste |
| 1 cup (approx.) | Bread crumbs | Made from crusts or store-bought |
Equipment Needed
Having the right tools makes the process smoother and faster.
| Amount | Equipment | Notes |
|---|---|---|
| 2 | Baking sheets | For drying bread sticks |
| 1 | Wire rack | Helps sticks dry evenly |
| 1 | Double boiler | Prevents peanut butter burning |
| 1 | Rolling pin | For crushing crumbs |
| 1 | Large bowl | For coating sticks |
| 1 | Knife | Prevents peanut butter from burning |
How to Make Peanut Butter Sticks (Step-by-Step)
Step 1
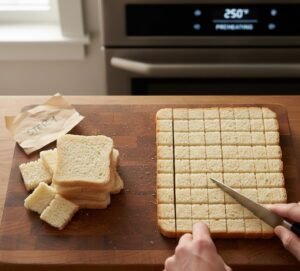
Preheat your oven to 250°F (120°C). Remove crusts from the bread slices.
I find it easier when the bread is slightly frozen because it cuts cleaner. Slice each piece into thin sticks of equal size so they bake evenly.
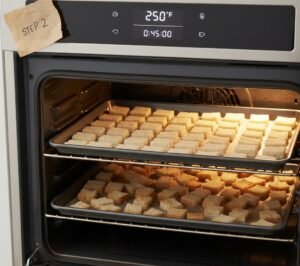
Step 2
Arrange the breadsticks and crusts separately on baking sheets. Bake them slowly for about 45–60 minutes until they become dry and lightly golden. The goal is crispness, not deep browning.
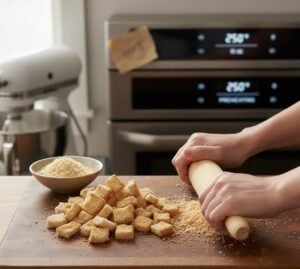
Step 3
Once baked, place the crust pieces inside a plastic bag and crush them using a rolling pin until fine crumbs form. You can also use a food processor if you want quicker results.
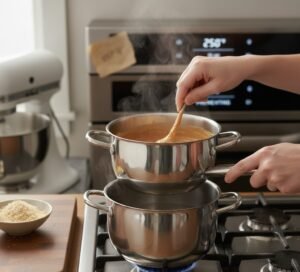
Step 4
Set up a double boiler over simmering water. Add peanut butter, vegetable oil, and sugar. Stir continuously until the mixture becomes smooth and pourable. Avoid direct heat because peanut butter can scorch quickly.
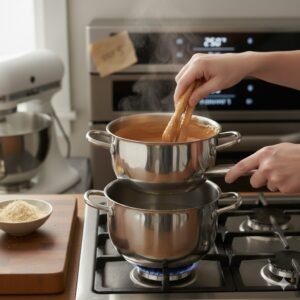
Step 5
Dip a few breadsticks at a time into the warm peanut butter mixture. Make sure they are evenly coated but not overly soaked.
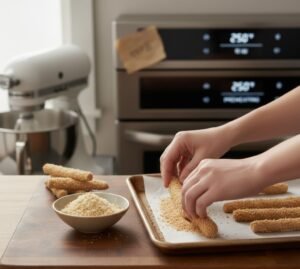
Step 6
Immediately roll the coated sticks in bread crumbs. Press lightly so crumbs stick well to the surface.
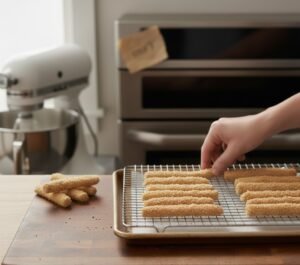
Step 7
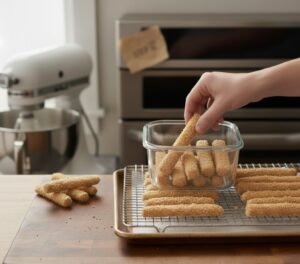
Place the coated sticks upright or slightly spaced apart on a wire rack. Allow them to dry completely at room temperature. As they cool, the coating firms up and creates a crisp outer layer.
Step 8
Once fully set, store them in airtight containers or freeze portions for later use.
Tips for Perfect Peanut Butter Sticks
I learned a few small tricks after making these many times. Freezing the bread before slicing really helps maintain neat shapes.
Baking at low temperature is important because fast baking makes the bread too hard instead of crispy.
Keeping the peanut butter mixture warm while dipping also helps maintain a smooth coating. If it thickens, simply reheat gently over the double boiler.
Variations of Peanut Butter Sticks
One thing I enjoy about this recipe is how flexible it is. You can add melted chocolate drizzle for a dessert version or mix powdered sugar into crumbs for extra sweetness.
Some people replace peanut butter with almond butter for allergy-friendly options. You can also roll the sticks in crushed graham crackers, nuts, or colorful sprinkles for party snacks.
Kid-Friendly Peanut Butter Stick Ideas
Kids usually love these because they are crunchy and slightly sweet without being overly sugary. I sometimes make smaller sticks for lunchboxes or dip half of each stick into chocolate for special occasions.
They are also great for playdates because they don’t crumble easily and are easy to hold.
Serving Suggestions
Peanut butter sticks are best served at room temperature once fully dried. I like serving them alongside milk, coffee, or hot cocoa.
They work beautifully on snack platters, holiday trays, or casual gatherings. Because they hold their texture well, they are also ideal for travel snacks.
Storage and Make-Ahead Tips
Store the sticks in an airtight container at room temperature for up to one week. Make sure they are completely dry before storing to prevent softness.
For longer storage, freeze them in sealed freezer bags. When ready to eat, allow them to come to room temperature naturally.
They taste just as fresh after freezing, which is honestly one of my favorite things about this recipe.
Healthy Notes and Nutrition Insights
Using whole wheat bread adds fiber compared to white bread, making this snack slightly more balanced. Peanut butter contributes protein and healthy fats that help keep you full longer.
Because oil and sugar are used, moderation is important, but overall, this recipe offers more substance than many processed snacks.
Nutritional Information (Approximate Per Serving)
- Calories: 120–150 kcal
- Carbohydrates: 12 g
- Protein: 4 g
- Fat: 7 g
- Saturated Fat: 1.5 g
- Fiber: 2 g
- Sugar: 3 g
- Sodium: 90 mg
Common Mistakes to Avoid
One mistake I see often is baking the bread at too high a temperature. That makes it brown quickly but not dry properly. Another issue is overheated peanut butter, which causes separation.
Also, avoid overcrowding during drying, since airflow helps the coating set correctly.
Delicious Peanut Butter Stick Variations to Try
You can dip finished sticks halfway into melted chocolate for a dessert version. Rolling them in cinnamon sugar crumbs adds a warm flavor twist.
Sometimes I even sprinkle a little powdered sugar on top for presentation when serving guests.
Small adjustments like these make the recipe feel new every time you prepare it.

Peanut Butter Sticks Recipe
Ingredients
Equipment
Method
- Preheat oven to 250°F (120°C). Remove crusts from bread slices and cut each slice into even sticks.
- Place bread sticks and crusts on baking sheets. Bake for 45–60 minutes until dry and lightly golden.
- Crush the baked crusts using a rolling pin or food processor to create fine bread crumbs.
- In a double boiler, heat peanut butter, vegetable oil, and sugar. Stir until smooth and fully combined.
- Dip a few bread sticks at a time into the warm peanut butter mixture until evenly coated.
- Roll coated sticks in bread crumbs, pressing gently so crumbs stick well.
- Place sticks on a wire rack and allow them to dry completely until the coating sets.
- Store in an airtight container or freeze for longer storage.
Notes
- Slightly freezing bread before cutting makes shaping easier.
- Keep peanut butter mixture warm while dipping for smoother coating.
- These sticks freeze very well for up to 2 months.
- Allow sticks to fully dry before storing to maintain crisp texture.
FAQs:-
Can I use crunchy peanut butter instead of creamy?
Yes, crunchy peanut butter works fine. It will just give the sticks a slightly rough texture and extra crunch.
Why are my peanut butter sticks not crispy?
Usually, the bread was not dried long enough in the oven. Bake slowly ata low temperature until fully crisp.
Can I freeze peanut butter sticks?
Yes, they freeze very well. Store them in an airtight freezer bag and thaw at room temperature before serving.
How long do peanut butter sticks stay fresh?
They stay fresh for about 1 week in an airtight container at room temperature.
Can I make these without sugar?
Yes, you can skip the sugar or reduce it. The peanut butter still gives enough flavor and richness.
Conclusion:-
I really enjoy recipes like this because they prove simple ingredients can create something memorable.
Peanut Butter Sticks are crunchy, comforting, and surprisingly versatile. Once you make them, you’ll probably keep a batch ready in your kitchen too; they disappear faster than expected every single time.
Read More:- Sweet Pineapple Tamales Recipe